Gameplay Animation Week 1: run cycle

This term I determine my personal project as a gameplay animation. The main reason is my enthusiasm and interest in the game industry. I have always wanted to work in this industry and become a game action designer. Therefore, I must have a deeper understanding of the pipeline of the game animation so I need more practice and academic research, most importantly, I need to have more related works to show my ability to complete my portfolio. Because the portfolio is the key to entering the industry, and doing game animation-related projects is conducive to my future career planning and development direction.

First of all, I want to start with a basic stuff like run cycle.

I did role walk and stylised walk in term1. After two terms of study, this is a very good opportunity to check my progress and review my basic knowledge.

Walking from term 1, it is terrible…
https://www.youtube.com/watch?v=C1W42gGsOuw

There are many show reels of senior game animators on YouTube for me to learn.

running reference

The principle of running is the same as walking,I set the total number of frames to 24,so frame 12-15-18-21 is a mirror image of the frame 1-3-6-9. and frame 1 = frame 24.

frame 1
frame 3.At this time, the character’s center of gravity is the lowest
frame 6,At this time, the character’s center of gravity is the highest.
frame 9
This is the blocking of the basic pose of arms and feet

Since the stepping movement is both up and down and left and right, so its motion trail will show a  shape——which called Figure 8.

Adjust the center of gravity (hips)

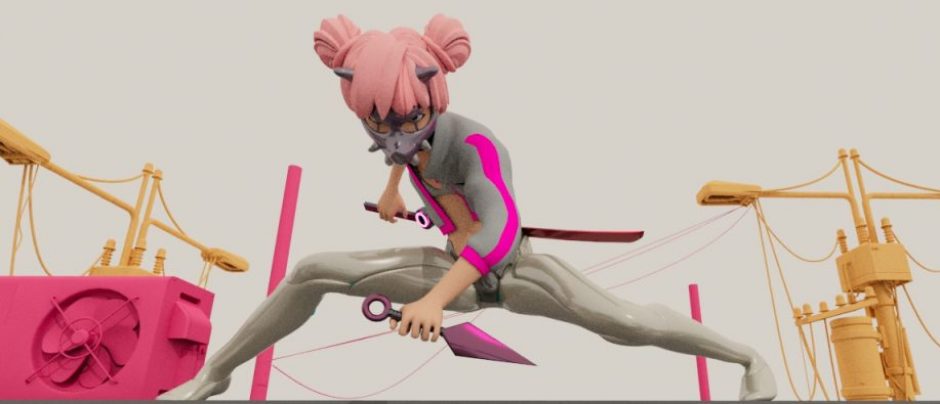
It should be noted here that because she is a female, the width of her crotch(hips) is larger than that of her shoulders when she is running, which is just the opposite of a man running.

adjust feet
The movement of the arm: It can be understood as a pendulum movement. It is worth noting that when the character run, the arms not only swing back and forth, but also have a certain swing range inside and outside.
Added overlapping of hair and swinging of clothes
This is the final rendered version
Posted in Advanced & Experimental 3D Computer Animation Techniques | Leave a comment

Collaboration Week 2 Prop design

For the team project this week, I mainly designed some key props, such as experimental equipment, computers, elevators, etc.

First is the experimental bottle.I found some reference pictures.

This is the experimental bottle I finally designed. It combines some energy elements and messy wires.
My idea is to put a monster in it as a research object.

High-tech computer equipment reference

COMPUTER concept design

computer in the second-floor (reference)
chair (reference)
My idea is to design a chair with a halo that can be suspended.
Elevator draft 1
Elevator draft 1

The above are some of my thoughts and references on props this week,I will design the rooms next week.

Posted in Advanced & Experimental 3D Computer Animation Techniques | Leave a comment

collaboration week 1 Group discussion and theme development

Firstly, I am honored to be invited to join the team of Kay, Crystal, and Yu, and I look forward to working with such excellent classmates. This makes me full of motivation and passion.

We had a group discussion on this Wednesday. The goal of our team at the beginning was to show the project in the form of AR.

AR example

Regarding AR technique, Crystal has done AR projects before, so she knows the technology in this area.

Ar project made by crystal a few years ago

After discussion, we positioned the main vision on the type of isometric, referring to high-tech and sci-fi scenes like cyberpunk.

  • Isometric:The term isometric comes from the Greek for “having equal measurement”. Isometric may mean Cubic crystal system, also called isometric crystal system.

Here is the picture reference we found:

After the brainstorming, we roughly determined the story of the project—using the Frankenstein high school student as the protagonist, building his laboratory, reflecting the computer, laboratory bottle, bedroom, work bench, laboratory props, etc. And to realize the character’s movement in the room and do some things (we considered whether we can interact with the audience, but unfortunately that is very difficult, we don’t have the technical support in that area, so we give up).

Work area reference
Laboratory reference

At the end of the meeting, we clarified the division of labor, Yu and Crystal were responsible for scene modeling, Kay was responsible for character building, Crystal produced Ar effects, and I was responsible for pre-design and digital drawing. At the same time, I will also assist in some modeling work and animation.

I look forward to this exciting team project! Especially since I have never learned about the application of Ar technology, I believe I can learn a lot through this collaboration.

Posted in Advanced & Experimental 3D Computer Animation Techniques | Leave a comment

Fighting Sequence Previs Week 10:Fianl Outcome

I rendered part of my animation and corrected some errors that I didn’t find originally, such as:

Unreasonable interspersed
Extra props
rigging problems

I also encountered many bugs and wrong operations during the rendering process, which made the slow process even more difficult. Fortunately, these problems were solved in the end!

Anyway,this is a very exciting teamwork,every member did their best to contribute.

In the preliminary preparations, Sean and Yann established the theme and story outline. Layne and Jay have produced different versions of storybord for the team to screen. Yann, Sean and I drew the early character settings.
In the mid-term, Murray was responsible for the binding of the roles. Yann and Sean modeled the character and converted the two-dimensional concept map into a three-dimensional asset. Evanna from vfx professional created the fabulous scene. Everyone made the animation clips they were responsible for.
In the later integration stage, Jay was responsible for the design of special effects, and layne added the sound part.
We upload all assets to onedrive regularly for everyone to review at any time.

I learned a lot from this project. I not only emerge many new ideas from the reference animation materials, but also tried modeling and lighting. I am really interested in the rendering part, and I hope I will continue to study this direction in-depth in the future.

During the animation, I also encountered a lot of difficulties, especially the rigging of men’s clothes really broke me. Thanks yann for giving me correction suggestions!

Posted in Collaboration Unit | Leave a comment

Fighting Sequence Previs Week 09:Rendering & lighting

I watched the above two videos, which inspired me a lot. Especially how to use Arnold mesh light.

Mesh light is very helpful to enhance the picture, especially for scenes full of high saturation colors and luminous bodies such as cyberpunk. I tried to increase the mesh light effect on my shuriken. I added a warm color to the blade part and mainly purple in the ring and adjusted certain parameters by my feelings. The effect is really great! It’s like a futuristic high-tech weapon.

original version
add mesh light

Then, I tried a certain degree of lighting on the characters. I want to render into a cyberpunk style. I added different area lights to the surrounding area, respectively setting purple, orange and blue. Mixing of different tones of lights.

original version with skydome light
add area light

Next, I continue to try mesh light, which can really make the picture super cool!

The feeling like Assassin lurking in the dark and high-tech weapons appeared first before characters show up!
This is my favourite one!

I also rendered my animation part, adding mesh light to the girl’s sword and the man’s mechanical eyes. Below are screenshots.

All in all, rendering and lighting are very important parts of the final stage of animation. The quality of rendering can directly affect the overall quality of the animation, and even get twice the result with half the effort. In the next semester, I will make good use of the course with KK to learn more about lighting.

Posted in Collaboration Unit | Leave a comment

Collaboration Week 08 Self-study: Robot Modeling

After handing in my animation part, this week entered the integration stage of the collaboration project which is composite, adding VFX and sound.

This week I will study a hard surface model (robot). The learning tutorial comes from the Internet.

modelling reference

First, I used basic geometry to build a simple model through Extrude and Bevel. The beginning steps of any modeling should originate from this operation

body part
robot with geometry

In the process of refinement, how to face the subject? First, add a certain thickness to the model through Extrude and Bevel.

The reason for increasing the number of faces is to prevent the model from making errors in subsequent operations.

Copy a cube, through Mesh > Booleans > Difference, I can get the effect in the picture. Of course, the objects obtained in this way are relatively rough and need to be re-wired to achieve accurate results (in other words, they can be put into the production process as “qualified products”). After three operations, I got this effect.

I also adopted the method of Booleans > Difference for the production of the vents on both sides. Cut out two holes with small cubes.

The disk of the robot head is made by Extrude the surface and Bevel edge to reflect its arc.
The round tube on the back is also and Bevel to make it more structured.

The operation of the lens is also the extrude and bevel, making it more like a circular camera, and its number of segments and faces should be increased (the more faces the model will be smoother).

Sleek display

The adjustment of the legs is the same way:Extrue of the surface and bevel of the edges are used. And Boolean are used to make the concave part.

Making process of mechanical legs.

Strictly speaking, after the components of this kind of complex structure are manufactured, very detailed wiring is required to make the objects more accurate.

wiring
Finish making the legs
Leg spring

Finally, I did a simple lighting layout and rendering of the model. The materials I used are Blinn and Lambert.

final model

I am satisfied with the final robot model. Through this week of study, I have a better understanding and control of modeling, especially mechanical models.

In general, modeling is the process of stacking different geometries. The most commonly used operation is Extrude. There are endless possibilities through extrude operations. The optimization process needs to use Bevel, some special effects can use Boolean.

Posted in Collaboration Unit | Leave a comment

Fighting Sequence Previs Week 07:Animation Part 2 (shot-3,5,6,9)

This week, I made shots of men:

3.frames 153-210 man looks up

5.frames 242-264 man stays back

6.frames 265-290 man stares

9.frames 427-500 man saying

Men do not have a lot of movements, only walking and backing, rest parts mainly facial close-ups.

And Overlapping of men’s clothes is a major difficulty.

Overlapping of men’s clothes in walking in shot1
Overlapping of men’s clothes
jump reference
jump back

Regarding emoticons, I studied last semester.

The corners of o’s mouth are closed inwards, and the corners of e’s mouths extend outward.
Cheeks: cheeks up when the mouth is flat, and down when the mouth is round
Mouth shape: cheeks down when the mouth is flat, upwards when the mouth is round.

cheek up,nose down
cheek up,nose down
cheek down,nose up
cheek down,nose up

The above is the part of my animation. I found that there are still problems with the rhythm, especially the part where the girl jumps down and the man jumps back. The speed is too slow, so I corrected it.

this is my final previz
Posted in Collaboration Unit | Leave a comment

Fighting Sequence Previs Week 06:Animation Part 1 (shot-1,2,4,7,8)

In the past two weeks, our team has mainly carried out character modeling, scene modeling, and skeleton rigging. After the assets are allocated, I will make the animation. Our division of labor is very clear, and each person is responsible for the production of a short animation. The content I assigned is as follows.

layout by Yann

I subdivided this animation into 9 shots to be produced in batches.

They are:

1.frames 1-72 girl looks down

2.frames 73-152 girl Squat down

3.frames 153-210 man looks up

4.frames 211-241 girl jumps down

5.frames 242-264 man stays back

6.frames 265-290 man stares

7.frames 291-379 girl stands up

8.frames 380-426 girl’s pose

9.frames 427-500 man saying

And this week,I will focus on the girl part(shot1,2,4,7,8).

Before starting, I looked for a lot of ninja videos. Refer to the ninja fighting style and poses.

The fight between Batman and the Deathstroke in this section is very exciting! Especially the action of jumping down the Deathstroke was something I wanted to imitate at first, but considering that my character is a light-action female ninja and the Deathstroke is more like a power type fighter, so I had to consider a better way to jump.

Deathstroke jump
fantastic shots

In this one, genji is the object worth learning. He assembled all the characteristics that a ninja assassin should have: agility, lightness, and fluent movement.

jump in shot 4.
This is a video that focuses on overwatch character animation, I have benefited a lot from it. especially from genji.
hand pose
Try to learn Genji’s poses in shot 2.

Regarding the way of holding the sword, I also referred to Genji and Akali in League of Legends.

In order to observe Akali’s movements, I specially entered the game and recorded a section.

The above is my work this week. I searched for a lot of videos and pictures to refer to the actions of the ninja (assassin).

Posted in Collaboration Unit | Leave a comment

Animation Self-studying:Blocking

I practice blocking through tutorials. The following are the resources I found on YouTube. Mainly training for key frame poses and timing.

This is the result of my practice

Posted in Design for Animation, Narrative Structures & Film Language | Leave a comment

Collaboration Week 05 Self-study:Digital Painting

This week, the team’s asset allocation is still in progress. So I will have a cyberpunk theme drawing exercise. Drawing has always been something I love and insist on, and it is also the best way to mediate myself in three-dimensional work and software (with music).
The reference this time comes from the famous Illustrator & Concept artistibrahem swaid on artstation. He is one of my favorite artist.

https://www.artstation.com/noobovich

reference by ibrahem swaid

I can’t accurately copy, the purpose of this exercise is to learn his color matching and rendering.

sketch
Color block
ink test
Shadow rendering

When rendering, I mainly used hard light and multiply to superimpose the layers. This can better achieve the effect of color mixing.

rendering

In short, this is a simple attempt. I tried a new way of layer overlay on painting. This is far from the final finished product. With my current strength, I still can’t reach such a high level. I still need more understanding and learning, the most important thing is understanding of character structure and lighting treatment. Anyways,I will continue this painting .

Team progress (updated on March 20th)

VFX test by Jay
Posted in Collaboration Unit | Leave a comment