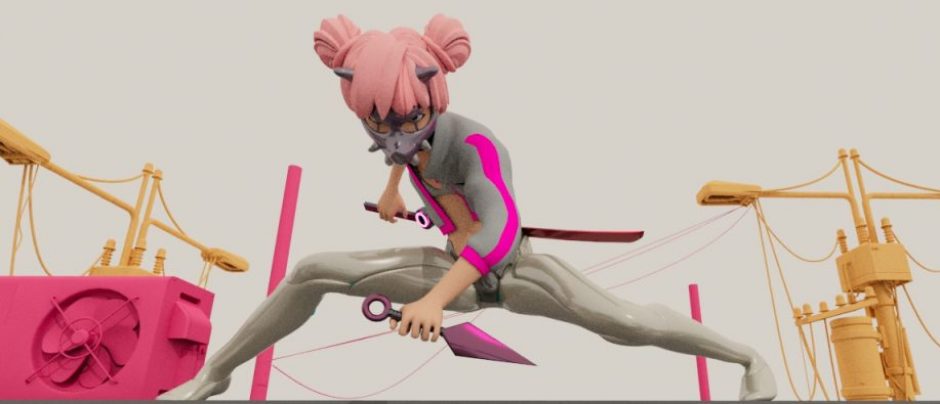
This week I will study and analyze the 3D skeleton binding ideas through the following steps: first study the skeleton structure of the 3D character, then study the production process of Maya skeleton binding and explore whether the smoothness of the characters in the 3D animation mainly depends on how well the skeletons are bound. Definition of Maya skeleton binding
Ⅰ. Definition of Maya rigging
Rigging is the operation of skinning the model with the created skeleton. Since the skeleton and the model are independent of each other, it is necessary to match each point on the model to the skeleton, and then use the movement of the skeleton to control the movement of the model.
Ⅱ.The specific content of Maya rigging
2.1 Joint
Rigging is to use the IK controller to control the movement of skeletons. There are two arm binding methods, one is rotation constraint binding, and the other is IK binding. Both can realize the adjustment of the movement, and the combination of the two is more convenient. Finger binding is to constrain each joint to control the rotation of the finger. The binding of the legs and feet is the control of the legs by using IK and the feet.
2.2 Facial expression
There are two types of facial bindings for characters. One is directly controlled by skeleton points, and the changes in expression are controlled by adjusting the skeleton points. The other is controlled by BlendShape, by adjusting the deformer slider to adjust the deformation effect.
Ⅲ.Maya role rigging thinking analysis
3.1 The rigging ideas of realistic characters
3.1.1 Rigging of the spine
The rigging of the spine mainly uses skeletons instead of clusters, through the skeletons to control the vertex operations in a region and to realize the rotation of the spine by moving and rotating the skeletons. Create a skeleton chain according to the human body structure, select the spine skeletons, create IK, and realize the control of the skeletons. In order to better control the skeletons, optimize the points on the IK curve to obtain three points, and then create three skeleton point data to freeze the data, Respectively snap to the curve points, skin the skeletons and the points on the curve, select the second option as the type, and move the skeleton points to move the skeletons. skeleton rotation, check IK rotation to achieve rotation, but there is a problem, the head skeleton axis is inconsistent, you must first create a skeleton start controller, select the correct axis, in order to achieve the rotation of the skeletons and control the skeletons Create three rings and group them together, and move them to the skeleton points. The ring and the skeleton points are used for child and parent operations. You can move the skeletons by moving the ring.
3.1.2 Rigging of arm IKFK
FK forward dynamics create three ring curves, use MEL language Parent-add-shapeAshape; add the shape nodes of the three rings to the arm skeletons, the rotation shape nodes are in the same direction as the arm skeletons, and the rotation of the shape nodes The rotation of the skeletons can be controlled. In order to distinguish, you can adjust the color of the ring.
IK refers to the reverse dynamics to create a ring group and move it to the wrist position, adjust the ring axis to be consistent with the wrist skeleton, and create the IK skeleton. Note that the skeleton should be rotated and recorded before creating the IK to avoid creating IK The direction of the skeletons is opposite, the new Loctor-set to the back of the elbow skeleton, the Loctor and the IK curve are used as polar vector constraints, moving the Loctor position can control the orientation and rotation of the elbow, the ring and IK are used for point constraints, and the fingers are for rotation constraints. Realize the rotation and bending of the ring control arm.
3.1.3 Rigging of the legs
Select the leg skeletons and set the IK for the skeletons. There are two types of IK. One is constrained by polar vectors, and the other is not constrained by polar vectors. Here, choose RP and use IK with polar vector constraints. The skeletons should be rotated and recorded before constraining, so that errors occur in rotation after IK is done. Create a new Loctor, select the Loctor to attach to the knee, and move it forward for a certain distance, freeze the Loctor parameter to zero, select Loctor and IK as the extreme vector constraint, and move the Loctor to control the direction of the knee. Make a CV controller for the foot, adjust it to be similar to the shape of the foot, to facilitate the selection and identification of the controller later. Create two RCIKs without pole vectors for the toes, soles and soles of the toes respectively, select the toes and soles of the IK to form a group, name it group 1, attach the axis to the sole of the foot, and rotate as the toe. Select the bare IK group and name it group 2, attach the axis to the sole of the foot, as the foot lift with the sole as the axis. Combine this group 1 with group 2 and name it group 3, and attach the axis to the toe as a rotation with the toe as the axis. Then group 3 into groups, named group 4, attach the axis to the toes, as the toes as the axis rotation. Combine group 4 into groups and name it group 5, and attach the axis to the sole of the foot as a rotation with the sole of the foot as the axis. Combine group 5 into groups and name it group 6. Attach the axis to the heel as a rotation with the heel as the axis. Combine group 6 into groups and name it group 7. Attach the shaft to the inside of the foot as a rotation on the inside of the foot. Group 7 into groups, name the group, attach the axis to the outside of the foot, as a rotation with the side as the axis, set group 8 and the foot controller as parent and child constraints, move the foot controller to move the foot, and this is complete For the left leg rigging, the right leg rigging is the same as the left leg rigging.
Ⅳ.The difference between Maya plug-in and Maya manual rigging
4.1 The difference between Maya plug-in binding and manual rigging .
The ultimate purpose of plug-in rigging and manual rigging is to make animation. Animation can be done. Any rigging can be used. If a company is doing a project, more requirements are Efficiency and quality, so most of them use plug-in rigging. Manual rigging requires a lot of time and effort. Although the rigging effect and deformation effect will be better and more convenient than plug-in rigging, plug-in rigging is sufficient if there are no higher requirements.
Conclusion
The smooth movement of characters in 3D animation depends on the quality of rigging, which is the core and soul of the entire 3D animation production.